

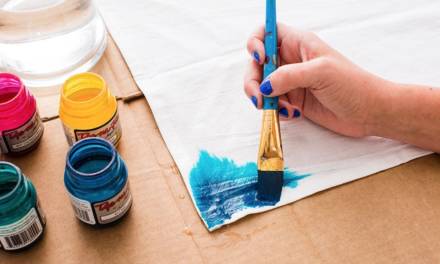
It is no surprise one of the most common questions folks looking to dye fabric want to know is how to dye wool. Wool fabric and yarn are one of the most popular fiber types crafters work with. The variety of crafts ranging from knitting and crocheting to sewing and macrame offer many opportunities. Wool is a natural fiber made from a sheep’s hair and is used in everything for knitting yarn to wool fabric.
All animal hair like wool are made of protein and classified as protein fibers. Other animal hair fibers, like cashmere, angora, mohair, and camel’s hair, are usually dyed the same as wool. Knowing a fabric’s fiber type is the most important information used to determine what type of fabric dye one should use.
Most fabric dyeing recipes used on wool call for an acid such as acetic acid, white vinegar (which naturally contains acetic acid), or citric acid. This is because wool fiber and all other animal hair fibers are sensitive to high-pH solutions. You may have even noticed this from using soap on your own hair that wasn’t pH-balanced and the effect it had.
Wool Dyeing Process: Step-by-Step
Whether you want to know how to dye wool yarn or wool socks, the process you choose is really up to you and your desired outcome while taking into account the manufacturer guidelines. In any case, the variables in dyeing are temperature, dye concentration, time and amount of fabric.
Common methods include immersion dyeing and steam dyeing, this guide will focus on the easiest and most effective of the two which is immersion dyeing. The washing machine method is a form of immersion dyeing but the stovetop method is considered the best as the best recipes for dyeing wool all require heat and you have more control which aids in achieving the absolute best results.
There aren’t many steps involved but it is important to follow each step carefully. With care and attention to detail, you will be able to create beautifully dyed wool fabrics and yarns with deep vibrant colors that are both light-fast and wash-fast.
Step 1: Select a Wool Fabric
When you have selected your wool material, whether it is yarn or already woven into a fabric one of the most important things to determine its fiber content. Every type of fabric fiber will achieve the best results using a specific type of dye. Determine if your material is a wool blend or 100% wool.
Step 2: Select a Wool Fabric Dye
There are numerous types of dye on the market including reactive dyes, acid dyes, all-purpose dyes, and more. For wool, acid dyes work best and specifically Lanaset/Labraset dyes which are an acid dye will achieve the most colorfast results, resisting fading from both washing (even in hot water) and light exposure. Natural dyes can also be used, usually with less desirable results. For more information on fabric dyes check out the best wool dye.
Step 3: Read the Manufacturers Instructions
The manufacturer’s instructions are the most important information you can have when dyeing fabric. Each dye manufacture has specific dye formulas and their instructions will ensure the best results possible when dyeing fabrics with their dye formulas and recipes. They will usually differ in both order of steps and ratios of the different chemicals.
- Dharma Trading Company: Instructions and Tutorials
- Jacquard Products:Product Instructions
- PRO Chemical & Dye: instruction sheets
Step 4: Select a Dye-pot
When choosing a dye-pot to you should choose a pot that is large enough that you can fully submerge the fabric with enough room to stir the fabric in the water to ensure full coverage of the dye mixture. Another thing you need to keep in mind the dye-pot material.
Since the wool dye process uses acid in the dye recipe, it can corrode the dye pot if it is made of a material that is affected by acid. Materials not affected are stainless steel and ceramic or enamel coated pots with no defects in the coating.
Step 5: Gather All of Your Dyeing Supplies
When dyeing wool, you will need a thermometer, safety-wear, dye-pot, and the various chemicals to both pre-wash the wool, dye the wool, and post-dye treatment. Tongs, measuring cups, spoons, pipettes, long-handled plastic will also be very useful. If you choose to pre-wash the wool to eliminate any chance of running into issues from dirt or oils on the wool you will need a textile detergent like Synthrapol.
For the actual dyeing process you will need an acid source like citric acid or vinegar, Ammonium Sulfate, and your standard acid dye. If you have chosen to use a Lanaset dye, in addition to what is already listed it is highly recommended to also use Albegal Set, Glauber’s salt for the most even dye results.
Step 6: Pre-Mix the Dye
You should prepare a concentrated dye mix that will be added to the larger dye bath later. To do this, measure the desired amount of dye powder using the manufactures shade chart or instructions. Paste up the dye with a little cold water, then finish dissolving the dye with 1-2 cups of boiling water depending on how concentrated your color is going to be. Stir thoroughly and set aside to cool while making the dye bath.
Step 7: Pre-Wash and Soak the Wool
After you have gathered your dye supplies and are ready to start preparing the wool fabric you can begin by washing it with the Synthrapol or another comparable textile detergent. This will remove all dirt and oils that will negatively affect the dyes bond with the fibers.
Wool fibers are susceptible to temperature shock, it is important that any temperature change is gradual which is why you should start with cool to room temperature water. Shocking the wool will affect the dye outcome. After washing the fabric you can set the wool aside soaking keeping it wet and allowing it to cool to room temperature if you used hot water to wash it.
Step 8: Prepare the Dye-Pot and Dye Wool
Now that your fabric and dye are prepped and ready you can add enough cool water to the dye pot to allow the wool to move freely. Next, add the mixed dye to the dye bath and stir the solution.
Typically you will combine the citric acid and ammonium sulfate to the dye-pot first and stir thoroughly. If you chose a Lanaset Dye you would also add the Albegal Set and Glauber’s salt with the dye, acid, and ammonium sulfate. If you add the wool first, when adding the subsequent additives, try not to pour them directly onto the wool. With wool, it is typically better to add the wool last to avoid too much agitation to the fibers.
*Note: The pH should be between 3-5, you may need more citric acid or vinegar depending on your local water.
Now you can begin heating up the pot very gradually while continually stirring everything very gently. The slow heat and continual stirring will help to prevent streaking and produce even dye result. The final temperature will depend on the recipe being used but will range between 185°F-212°F.
The heating process should take between 30 minutes to 1 hour. When the dye solution reaches the right temperature the dye will fix to the fabric and the water will begin to clear pretty quickly.
Step 9: Cool the Dye Bath and Wash Wool
After the dye has set into the fabric you will need to allow the dye bath to cool down naturally to room temperature. Once the dye bath is cool, you can remove the wool and rinse it thoroughly in cool water.
The final step is to wash the wool one last time with the Synthrapol or comparable textile detergent to remove any remaining dye that did not permanently set onto the wool fibers. This will prevent any bleeding of the dye onto other fabrics during subsequent washes.
Final Step
For the final and easiest step, dry your wool! Once dry you can treat your newly dyed wool fabric, just like any store bought item, as the dye is permanent and should be very wash-fast.
Other Wool Dyeing Tips & Considerations
Below are just a few more things to consider when you are planning to dye wool.
Wool Shrinking and Felting
If you aren’t already aware, untreated wool is prone to shrinkage, treated wool like Superwash or Smartwool are less prone. This shrinkage is due to the wool fibers becoming more closely interlocked in the presence of water and subjected to heat and agitation. To prevent felting and shrinkage, you must be careful to avoid agitating your wool while it’s in the hot dye bath. With wool dyes, the auxiliary chemicals allow level dyeing without stirring the fiber.
If you intend to felt the wool after the dye process it is best to use Lanaset dyes to achieve the maximum wash-fastness as the felting of wool may make other dyes susceptible to bleeding.
Mottled, Streaking and Other Effects
A very popular effect for dyeing yarn is the desire to achieve a mottled look or even streaks and splotches. This uneven setting of the dye to the fabric is actually quite simple to achieve with a little practice. In terms of the dye recipe, the only modification that should be made is using only the dye and acid and skipping the other chemicals.
You will use the same heat process as before to achieve these effects. You will usually skip any stirring of the fabric to avoid maximum coverage. Another method prepares and heats the dye recipe without adding the fabric to the dye pot but rather pouring it over the fabric or yarn. Most other effects can be achieved using various techniques, the most important thing is using the hot dye recipes with caution on the technique of your choice.
Final Word
As you can see, there isn’t much to dyeing wool the correct way. It is just a process just like any other that should be followed precisely. While Lanaset dyes are typically not always easily available, they are always recommended since they are the best choice for dyeing wool. The second choice is your standard acid type dye and last resort being all-purpose which is really just a combination of acid dye and direct dye.
If you have any questions or tips leave us a comment. Good luck with your next wool dyeing project!


are mason jars that contained Pro Chem Dye (without the acid) safe to reuse for food?
NO! not if you are using acid dyes.
Where are the calcuations for dye per fiber weight?